|
It's test week for all my kiddos so I figured what better way to help the Doodlebugs shake off the stress and let loose than to paint some Trolls y'all! I know I had a BIG obsession with Trolls when I was little (yup... all those who had their furry top pencils let me hear a whoop whoop! lol) and I'm in love with the remake of the old story. Plus who can beat all those bright colours and Justin Timberlake's voice. Yeah I can't think of anything more fun and I tried. Turns out I was right! The Doodlebugs were literally bouncing in their seats when they realized what we were going to do and it shows in their art! I did a simple directed line drawing of a troll and then gave them options for how to turn it into Princess Poppy or Branch by changing up the hair and clothes etc. Check them out!
0 Comments
It's weird how my mind works but I'm guessing all the feathers and wings have got me stuck on birds! So the Picassos launched into using up some of our hefty supply of gorgeous painted papers to make a little art piece I'm calling "Birds on a Wire". We've all seen them. Little birdies just hanging out on the electrical wires that have become a part of the landscape of modern day life. But have you seen them look quite like this? I think not! These birds are bright, patterned and whimsical (thanks for the raw material Doodlebugs) but this piece also has some serious lessons on scale, perspective, balance and composition. Feast your eyes... This term I wanted to get all my students working in unison on one big collaborative piece. I took some time to decide what it should be and I came across a project that was originally done by a graffiti street artist which was a huge presentation of wings with a space in the middle for people to insert themselves and 'take part' in the art piece. I thought this was a lovely concept and it was also a positive theme that could spawn lots of great conversation about the things that motivate or make my kiddos feel good about themselves :) Of course working together also encourages cooperation and the recognition that pooling your efforts can make a huge task seem a lot more manageable and all that good stuff! The picture below is the work of the original Nashville artist which is painted on the side of a building for folks on the street to use for their keepsake snapshots! 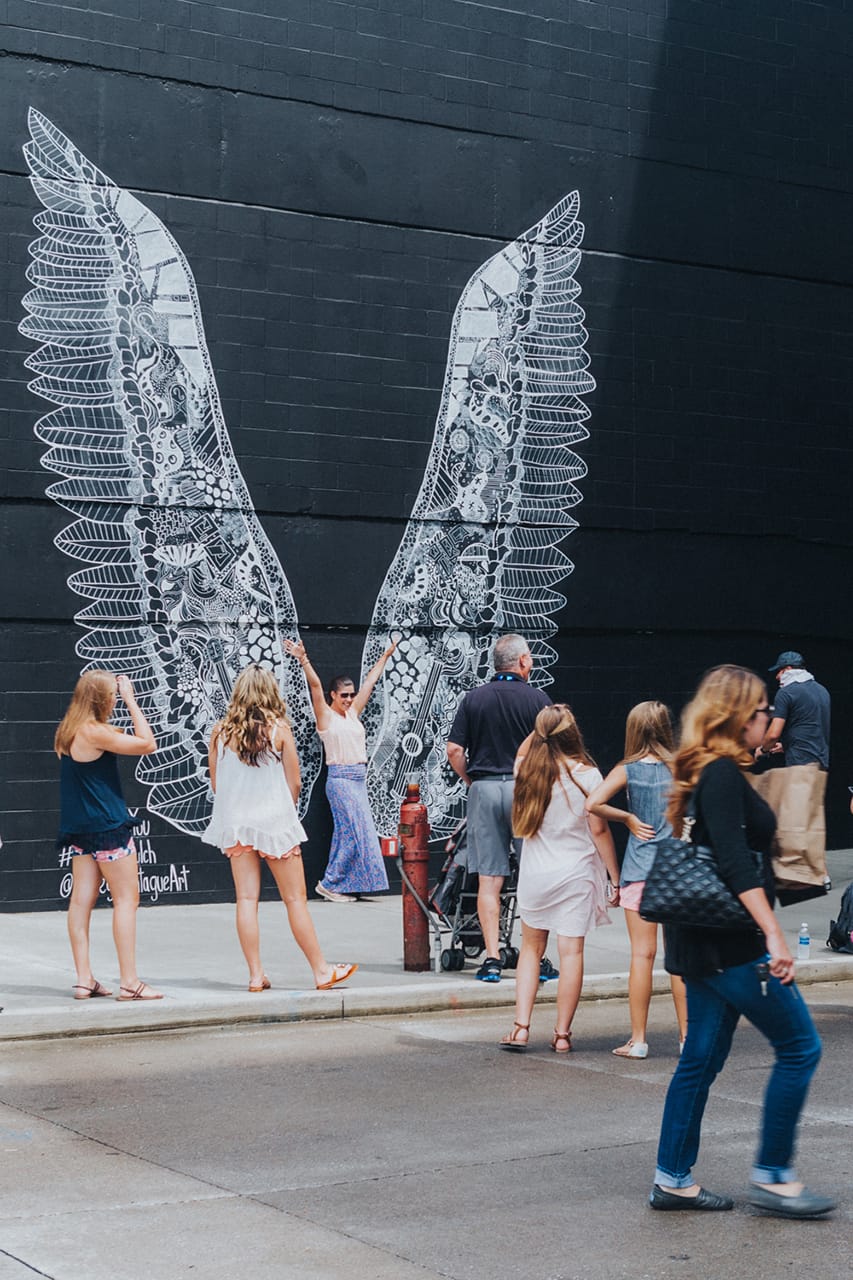 But of course I couldn't leave it at that... noooooooooo. I tweaked it so there were some of those trusty 'elements of art' concepts that we're always going on about. The element we'll focus on here is VALUE, which basically speaks to the extent of lightness or darkness in a colour or hue. So for our version of these wings each child created a personalized feather by painting a gradation (moving from dark to light) using the colours found on the colour wheel. Then they added lines and pattern on top of that in white for even more pizzazz! Take a look at what we've done so far :) Next week the whole project will come together as all the classes have an opportunity to make a feather and we mount them in the hall! Our wings are finally complete and they are certainly a hit! Can't help but think they kinda look like a Carnival wing/backpack thingy :) Notice that our feathers are laid out in the order of the colour wheel! So now we have a giant colour theory reference right outside our door... a neat side effect of this gorgeous project. Even some of parents had to take a pic with the wings and that's what it's all about! The illustrations in this book are absolutely gorgeous so I knew my Doodlebugs would enjoy recreating these little birds using our painted paper from last week! The story tells of a little girl and her father waiting for cherries to grow on their tree so they could make a delicious pie. It describes the stages the tree goes through and it is told in a wonderful rhythmic voice :) After listening and looking at the pictures they were given bird templates and told to make a picture of a bird on a cherry tree branch. Collage art is always a hit with my Doodlebugs because they get to do two of the things they love most in the world... cut and stick! Cutting is especially important for some key reasons:
Aren't these Doodlebugs precious? Take a look and see what I mean. As turtle nesting season approaches I thought we could use our art to draw attention to the plight of the amazing leatherback turtles that grace our shores each year. The Picassos took in this video and we talked a bit about
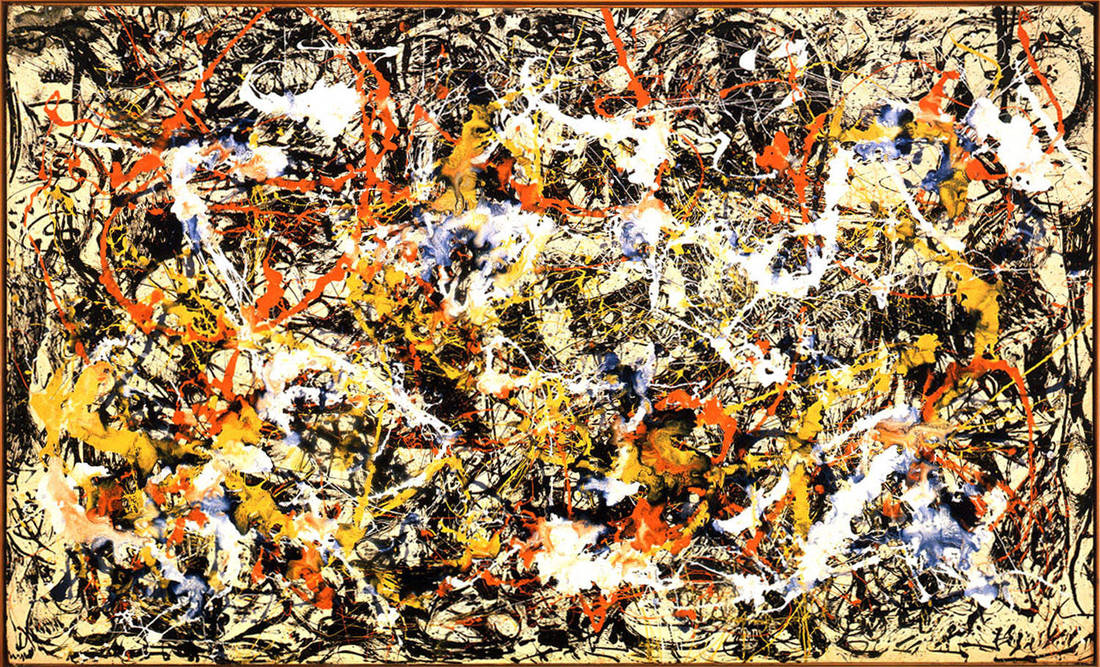
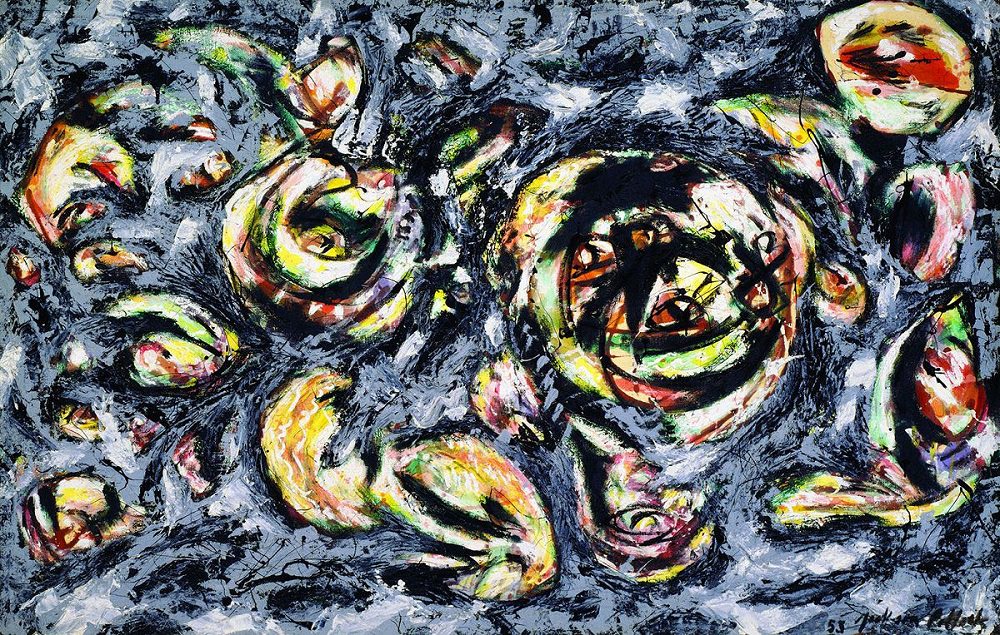
While you're here be sure to check out what we're up to for Easter Art Camp! From the moment the Doodlebugs walked into the art room they realized something was different... for one there were a bunch of strange looking tools on the tables and I guess they could just feel it in the air lol... When I explained that today we were going to make 'abstract art' in the form of painted papers my little ones were taken off guard and some of them were downright confused! Of course I saw this coming so I thought I would introduce them to the art of Jackson Pollock so they could see that art doesn't have to make 'sense' in the traditional way. As a matter of fact one of my kiddos commented during the process "miss how you going to explain that?!?" LOL needless to say I couldn't hold back the laughter. So anyway... I'm getting ahead of myself. They looked at this little intro to Action Jackson as he is affectionately called... This is one of the messiest things you can ask a child to do... smear paint all over a paper and use paint scrapers and rollers, fingers and marbles and a bunch of other curious looking things to create lines, patterns and texture... but boy is it fun! As you will see some of my Doodlebugs started off a little apprehensive but they all soon got into it and using the tools, moving around the room from table to table to test out all the rollers! While these pages are beautiful all on their own, we made them as the foundation for a ton of other projects to come. We're going to snip and cut them into shapes and images to be used in collage projects... so stay tuned for how we use our painted paper!
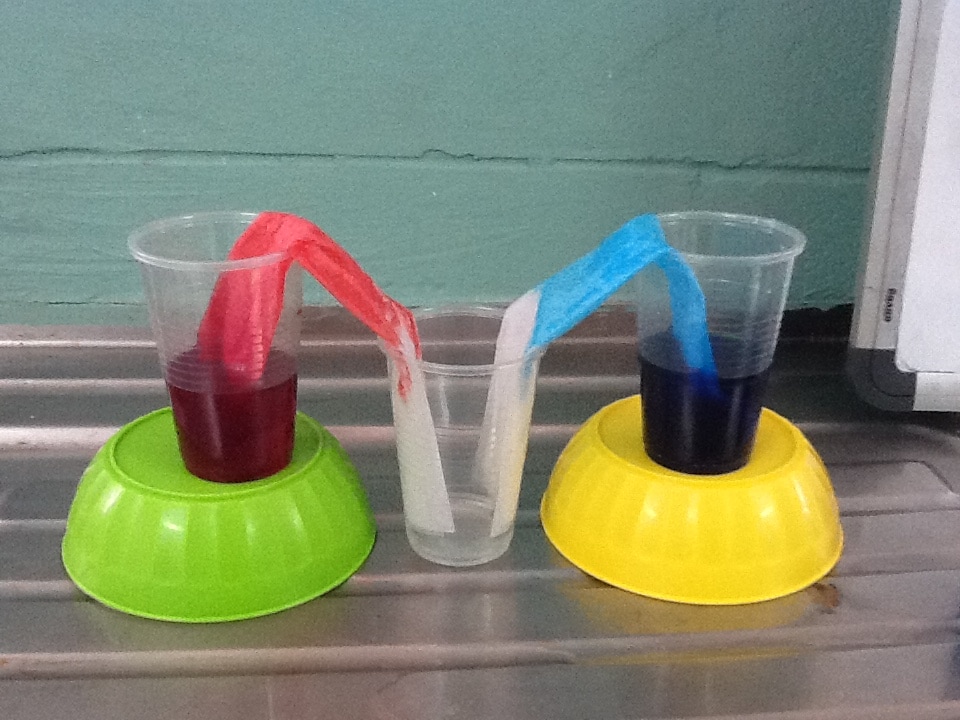
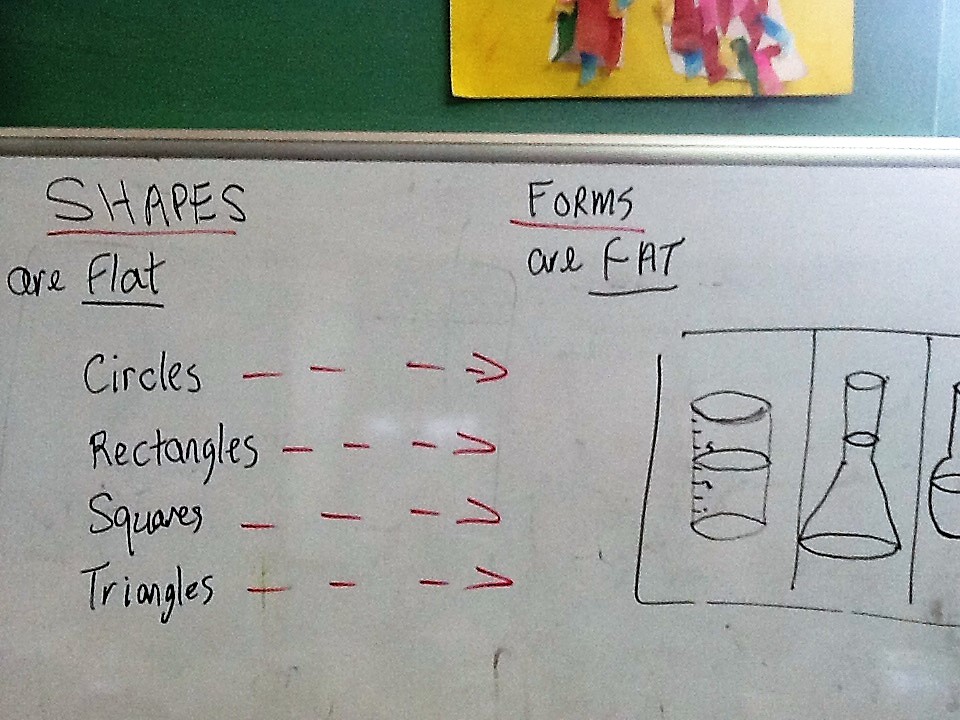
Today we worked a bit of science and math into our art. Our Science Experiment At the start of class we discussed how primary colours mix to form secondary colours and how all colours come from different combinations of these three colours. To demonstrate this we used some paper towels, water and food colouring in cups. Two primary colours (red and blue) were placed in two cups on either end and a third cup was placed in the middle with just water. It took the entire class (we were checking on its progress throughout) but eventually the coloured water travelled up the paper towel and met in the middle and created a new colour... purple! We talked a bit about the sciency (yup I just said sciency lol) part of this experiment... namely why the water moves along the paper towel so they got familiar with terms like absorption, adhesion, capillary action and even gravity (I put the 2 end cups on a height so the liquid would travel a bit faster). We also talked about when this capillary action happens in nature... when plants take water up through their roots and up their stems! Now for the Math part... One important element of art is FORM and this refers to objects that are 3-dimensional, or in other words, not flat. In other disciplines such as math this concept is explained in terms of shapes and solids. Shapes are flat and solids have form or are 3D having length, width and depth. So we reviewed this simple concept by discussing simple shapes and their solid counterparts... for example a circle is a shape and its solid is a sphere, a square is a shape and its solid is a cube, a rectangle is a shape and its solid is a cuboid... etc etc. Then we moved on to how we represent this in art! The Picassos were asked to draw 3 different types of beakers (it is mad science colour mixing after all!) and turn them into solids or 3D forms. These beakers were to hold our 'liquid' for the colour mixing part of our lesson today. So I demonstrated how we use line to create an optical illusion and turn a 2D shape into a form! We then went into colour mixing using a wet on wet technique so they got to see the colours move towards each other on the page and change right before their very eyes! We stuck to primary colours (red, blue and yellow) so they could then mix our secondaries. Next they worked on drawing some gorgeous bubbles using chalk pastels on black paper which serves as the background for our piece. The bubbles also reinforced the form concept because they created mostly spheres using curved lines inside the flat circles... but of course it didn't take long for somebody to say "miss... you know bubbles are all kinds of shapes.. not just round" When our bubbles were drawn in the beakers were cut out and stuck into place. The Doodlebugs mixed secondary colours out of the three primaries today. For some this is a skill they are familiar with and for others it was a new trick, but it was fun for everyone! We also started class off with the 'walking water' experiment to demonstrate how 2 of the primaries mix to create a secondary colour. I didn't go too deep into the science with my Doodlebugs but I did tell them that the same thing happens when roots drink water from soil and the water travels up the stem to the leaves etc. The all got to say capillary action... which came out in all different versions lol but they were constantly checking on how far the colours moved up the paper towel as class went on! The each got their own pallet with the primary colours and mixed their secondary colours all on their own. Then they cut out their ovals and we painted a branch on another piece of paper and they stuck them into place. Of course we also decked our little birdies off with googly eyes and 'real' feathers ;P (Aunty Natalia knows how to pump up the oooh factor lol.) |
Welcome!
Be a fly on the wall in our art room! Take a look at what we do, how we do it and the smiles that I get to see week after week :) Archives
February 2020
Categories
All
|


 RSS Feed
