|
Today the Doodlebugs took a look at a fun video on the life of the Monarch Butterfly and then of course we had a little chit chat about symmetry and what that means! We really looked closely at the gorgeous orange and black of the Monarch Butterfly and it's patterns and then they got down to creating this wondrous creature using our nifty printing technique. No drawing here! My little friends held their big brushes and made big sweeping movements to create wings and printed them on the other side and the looks on their faces throughout the process! I got a good many of them with the old 'tongue sticking out the mouth concentration' look lol! They also got to practice some more colour mixing as I made them layer yellow and red and then of course they got our gorgeous orange monarch colour! Colour mixing this way is a lot less messy... hmmm 
0 Comments
The Picassos and I journeyed half-way around the world for the inspiration for our art lesson today and we landed smack dab in the middle of Russia's Red Square! 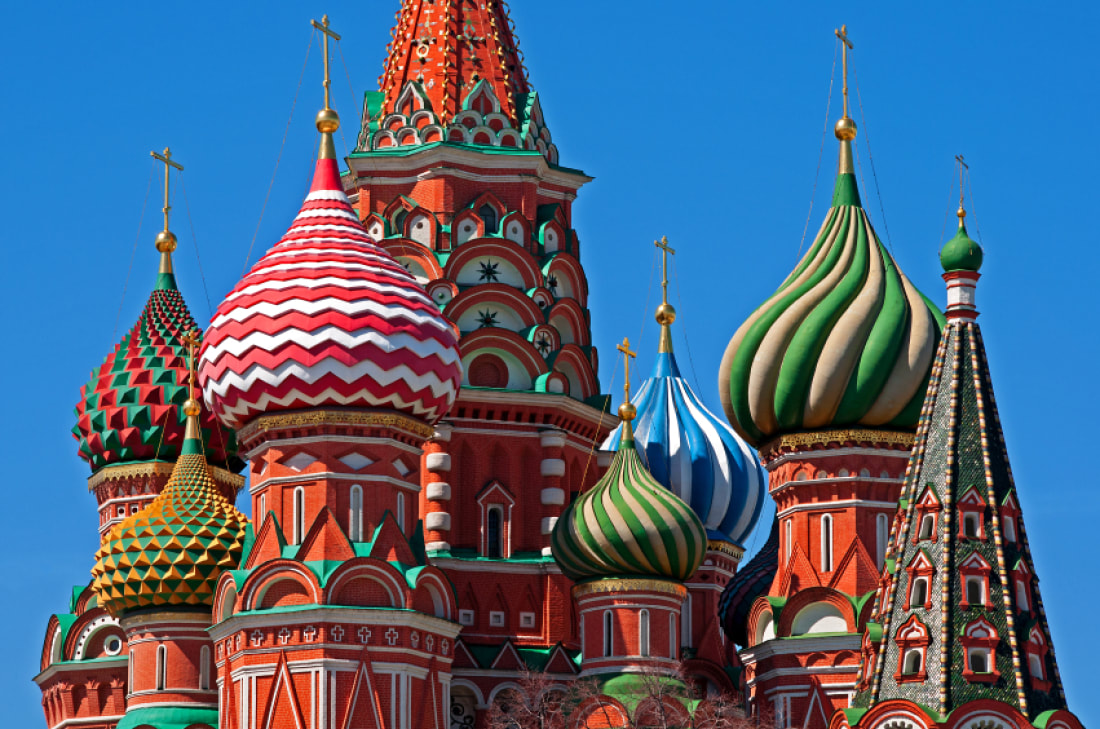 We took a look at St. Basil's Cathedral and of course they learnt a bit about this very ornate building's history and purpose! Did you know that it is made up of 9 separate buildings that are all arranged around a central column? Or that the colourful structure that is famous today actually spent it's first 200 years in plain white?!? Yup, the colours were added long after it was built and they are said to come from a description in the book of revelations. Speaking of revelations... the cathedral is not a cathedral at all... it's actually a museum! Anyway, this structure is so complex and full of colour, that I thought it would make a beautiful art project, but it also serves to connect the Picassos to our world and introduce them to a foreign culture! Another cool side effect... we get to point out some math connections as well! We talked a bit about geometric shapes, how squares and rectangles have 4 right angles and looked at the use of 2D figures in our drawing! This is a 2 part lesson, so they will draw today and St. Basil's will be painted in our next class!  When I told my Picassos that we were going to paint without paints I got two main responses... Some of them gave me the 😳 face "Well I guess today is the day.. . Miss has finally tipped over into crazy land" but some of my kiddos looked at me like 🤔 "ok I'm interested to see where you're going with this." I'd like to think that I can eventually convert all my kiddos into believers of my process lol... But we shall see 😆 Anyway, the children used chalk pastels to make a simple drawing of some colourful birds. (I brought lots of reference pics of finches, lorikeets, budgies and more.) Then I showed them the magic trick! They mixed up some liquid starch and I had them guessing what applying this mixture over their pictures would do and we set it up like a little experiment! They made a hypothesis or prediction of what would happen, they observed, tested and we drew our conclusion! Liquid starch lends chalk pastels some of it's viscosity! This means the chalk colours become easy to mix and blend just like paint and the results are nothing short of wondrous!  This week the Picassos looked at one of the elements of art VALUE. Value is the degree of lightness or darkness in a colour or hue. Artists use value to manipulate space (another element of art) because the further away things are the lighter they appear. This phenomenon is called atmospheric perspective... Phew! That's our big art term for the day and it simply means how we see the air around us! We discussed how things appear to fade off into the distance because of dust, humidity or even air pollution. Take a look at them in action and see how they achieved the goal of making the forest look like you can walk further and further into those enchanted trees by varying the value of the colour we used! For Mother's Day this year the Doodlebugs are working hard on making a gorgeous little flower pot collage. We're making all the elements from scratch so this one will take more than one session but I know that you know it will be worth the wait! Today they are mottling the background for our art piece and prepping the parts of the flower... so of course we're also learning as we go. So they're naming the parts, petals, stem, leaf, seeds! We're not showing roots in this art piece but they know they're there :) Take a look at our progress... but Mummies please you're only getting a sneak peek because I don't want to spoil the 'surprise' ;) Follow me on Instagram #artypantsstudiott if you enjoy the overload of cuteness or if you want to keep up to date on what's happening at the studio!
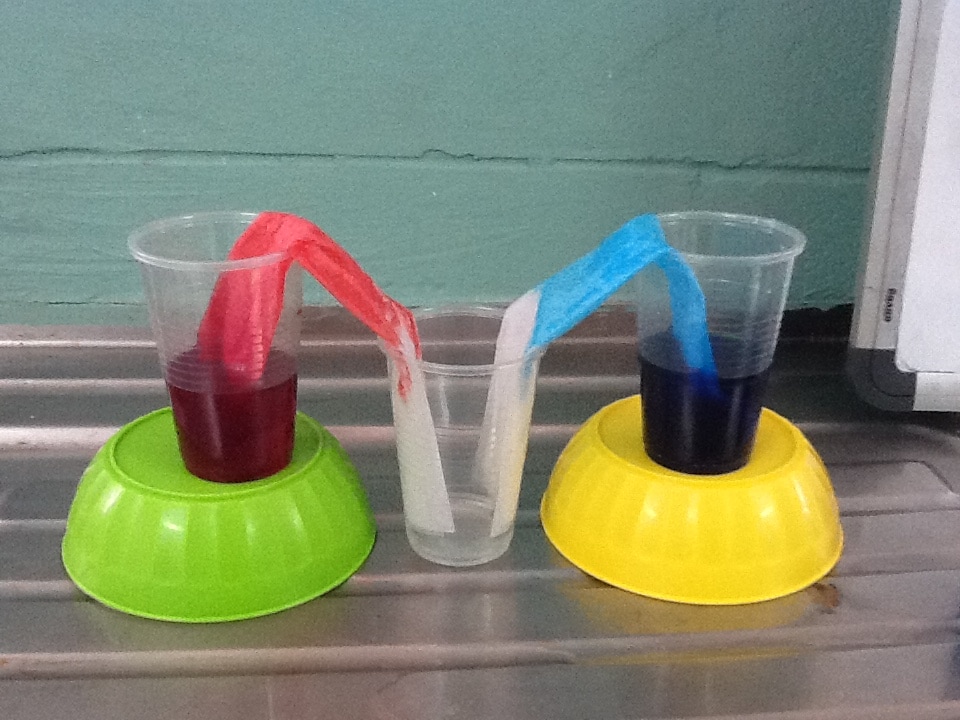
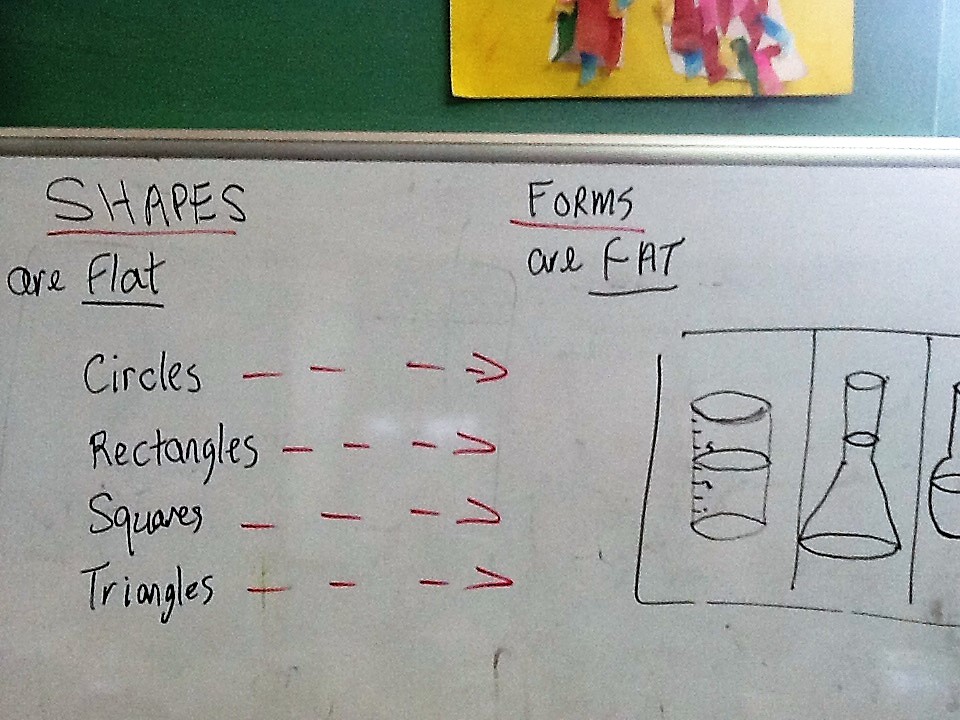
Easter is upon us and while most of my Picassos (both Christian and non-Christian) generally understand the religious importance they were all totally clueless as to the origin of the Easter Bunny and the significance of Easter Eggs... go figure lol. So we discussed why bunnies are associated with new life... which is a popular theme of Easter! I told them that if you put a boy bunny and a girl bunny in a box you'd soon have lots of baby bunnies! As for the eggs well they are also a symbol of new life and birth but they may also have been linked to Easter because long ago the Church prohibited the eating of meat, fish and eggs during lent so having them again at Easter became a special treat! We managed to get through our entire discussion without ever debating whether the Easter Bunny is real or not to my great relief because I know that I have a mix of opinions in my class on that front! Oh and of course I also pointed out my little homophone title... the Picassos had a brief head-scratching moment before the could recall the word in English for 2 words that have the same pronunciation but different spellings and meanings. English and art... squeezing in that learning whenever we can! After we all of this talk I showed them our project for the day. We created a portrait of Mr. Easter Bunny and focused on the use of line (another element of art) to show how the artist can vary the shape, thickness and style of line to say different things to the viewer. They also deconstructed the bunny and put it back together again for a different look to the basic portrait. Today we worked a bit of science and math into our art. Our Science Experiment At the start of class we discussed how primary colours mix to form secondary colours and how all colours come from different combinations of these three colours. To demonstrate this we used some paper towels, water and food colouring in cups. Two primary colours (red and blue) were placed in two cups on either end and a third cup was placed in the middle with just water. It took the entire class (we were checking on its progress throughout) but eventually the coloured water travelled up the paper towel and met in the middle and created a new colour... purple! We talked a bit about the sciency (yup I just said sciency lol) part of this experiment... namely why the water moves along the paper towel so they got familiar with terms like absorption, adhesion, capillary action and even gravity (I put the 2 end cups on a height so the liquid would travel a bit faster). We also talked about when this capillary action happens in nature... when plants take water up through their roots and up their stems! Now for the Math part... One important element of art is FORM and this refers to objects that are 3-dimensional, or in other words, not flat. In other disciplines such as math this concept is explained in terms of shapes and solids. Shapes are flat and solids have form or are 3D having length, width and depth. So we reviewed this simple concept by discussing simple shapes and their solid counterparts... for example a circle is a shape and its solid is a sphere, a square is a shape and its solid is a cube, a rectangle is a shape and its solid is a cuboid... etc etc. Then we moved on to how we represent this in art! The Picassos were asked to draw 3 different types of beakers (it is mad science colour mixing after all!) and turn them into solids or 3D forms. These beakers were to hold our 'liquid' for the colour mixing part of our lesson today. So I demonstrated how we use line to create an optical illusion and turn a 2D shape into a form! We then went into colour mixing using a wet on wet technique so they got to see the colours move towards each other on the page and change right before their very eyes! We stuck to primary colours (red, blue and yellow) so they could then mix our secondaries. Next they worked on drawing some gorgeous bubbles using chalk pastels on black paper which serves as the background for our piece. The bubbles also reinforced the form concept because they created mostly spheres using curved lines inside the flat circles... but of course it didn't take long for somebody to say "miss... you know bubbles are all kinds of shapes.. not just round" When our bubbles were drawn in the beakers were cut out and stuck into place. Now that we all know what a habitat is and have them painted and ready for their occupants, it's time to draw out the animals that are going to live in these habitats! For this part the Picassos drew their animals on a piece of white paper and painted them in. They cut them out and stuck them into place. Of course they could choose to draw one animal or several and position across the piece. Voila! Gorgeous animals in their habitats! I'm so proud of these young artists because a lot of factors came into play. They had to make decisions about composition, they also had to mix colours and of course focus on perspective to make their animals look in proportion to their habitat. Congrats Picassos! Job well done :) For the other parts of this lesson see below Part 1 Part 2 Today the Doodlebugs were in outer space! We talked about symmetry and what it means and then we used our craft supplies to create alien space creatures that were the exact same on both sides... I'm sure you can imagine the chaos and the fun... lol! Oh and of course we had to paint a background complete with a spaceship for our little girl aliens... yes these aliens are all girls. Naturally. The Picassos jumped back into their habitat landscapes this afternoon! We're using a great mixed media technique blending paint and oil pastels and the Picassos are really soaking up the process of making this art piece :) See the first part of this lesson here.
|
Welcome!
Be a fly on the wall in our art room! Take a look at what we do, how we do it and the smiles that I get to see week after week :) Archives
February 2020
Categories
All
|


 RSS Feed
